THE DECONSTRUCTED FALAFEL SALAD FROM "FAMILY" by Lindsey | Dolly and Oatmeal


happy weekend, friends! just popping in quick to share this delicious salad with you. i’m mindful that it may still be cold, even snowy, where you are, which is why i’m sharing a warm salad with you. this deconstructed falafel salad, (aka, a genius recipe, if you ask me), comes from the new spring cookbook that i absolutely adore, FAMILY. it’s written by hetty mckinnon who also authors the beautiful blog, arthur street kitchen.

this is hetty’s third book (!), and its’ pages are filled with beautifully accessible and approachable vegetarian recipes. its touching photographs and anecdotes of family and tradition pull at my heart strings each time i open the book. i think for the majority of us who enjoy cooking our your people - whoever that may be - is a form of nurturing them. FAMILY captures this notion, but also allows the reader/consumer to imagine making their own memories with the recipes that hetty so generously shares. i’m taking serious note of hetty’s wealth of knowledge here, as she’s a mother of 3, and a cook.. i’m very well acquainted with how cooking for your family (after a day of cooking for work) can feel very much like a chore, but i keep drawing on hetty’s idea of creating a recipe repertoire - the dishes that are comforting, easy to shop for without a list, and adaptable. there are already so many dishes in her book that i am so eager to make into our family classics.

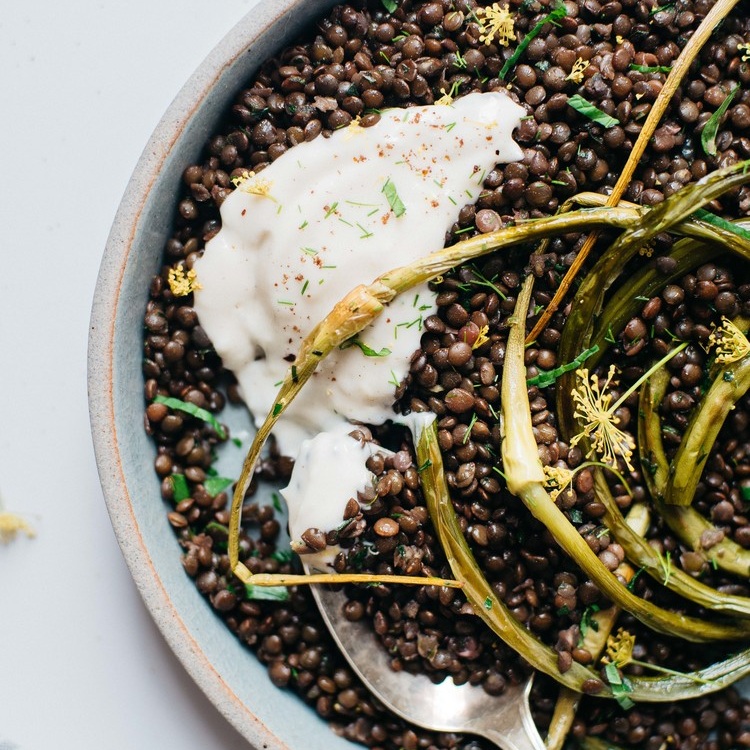
this recipe has a few more steps but only because you’re cooking the chickpeas, and lightly sautéing the kale, other than that there are a few quick chops and you’re ready to serve. this is a hearty salad on its own. if you’re not one to have a big appetite for dinner this would be great. i added some shredded chicken for extra protein, but you i could see this salad as is being plenty for someone who isn’t growing a human ;) so what’s deconstructed about this falafel salad? well, for starters, there is no falafel! don’t get me wrong, i love falafel, but making them can be a little labor intensive, especially if you’re preparing dinner the night of. instead, hetty has you cook the chickpeas (which are the cornerstone ingredient to most falafel recipes) with all the falafel seasonings: fresh garlic, cumin, paprika, salt, and pepper. then you cover it all in olive oil and bake it at a high heat, essentially slow frying the chickpeas (insert: drooling emoji). the result is genius: crispy (but not dry) chickpeas, and a falafel-infused oil that is so flavorful i wanted to pour it over everything.

in the end you get the falafel with half the work, and a new technique for crisping chickpeas. it’s a wonderful recipe to have in your back pocket for weeknight dinners, gatherings (you could easily double the salad), potlucks, spring picnics, etc. i have a very good feeling you’re going to love this recipe :)

xo!


the deconstructed falafel salad | v

recipe from: FAMILY by hetty mckinnon

| serves 4 |

  • extra virgin olive oil

  • 2 bunches kale, stems removed and leaves torn

  • 1 persian cucumber, sliced into thin rounds

  • 3 cups (150g) store-bought pita chips (i omitted these, but you could easily substitute a gluten-free alternative)

  • handful of flat-leaf parsley leaves, roughly chopped

  • handful of mint leaves

  • 1 lemon, cut into wedges

  • sea salt

crispy roasted chickpeas

  • 18 ounces (500g) cooked chickpeas (about 2 drained cans), patted dry

  • extra virgin olive oil

  • 2 garlic cloves, finely chopped

  • 2 teaspoons ground cumin

  • 1 teaspoon paprika

  • sea salt and black pepper

lemon tahini

  • 1/3 cup (90g) tahini

  • juice of 1 lemon, plus extra if needed

  • 1 garlic clove, very finely chopped

  • sea salt and black pepper

*hetty’s notes:

substitute

  • chickpeas: white beans, butter beans

  • omit pita chips for gluten free


method

  1. preheat oven to 425°F (220°C)

  2. for the crispy chickpeas, place the drained chickpeas in a small ovenproof dish. cover with olive oil, season well with two big pinches of sea salt and black pepper, and add the garlic, cumin, and paprika. stir to combine. roast for 35-40 minutes, until the chickpeas are crispy. set aside.

  3. for the salad, place a large frying pan over a medium heat and drizzle with oil. add the kale, in batches, along with a pinch of salt and cook 2-3 minutes, until wilted.

  4. to make the lemon tahini, pour the tahini into small bowl and whisk in the lemon juice and garlic. gradually add 1 tablespoon of water at a time, until the sauce is the consistency of thickened cream. if the tahini “seizes” and becomes very thick, add more water; it will eventually come back together to form a cohesive creamy sauce. season with sea salt and black pepper, and add more lemon juice if you like it lemony.

  5. combine the crispy chickpeas (and their cooking oil) with the kale, cucumber, half the pita chips and herbs. to serve, drizzle over the lemon tahini and scatter over the remaining pita chips. serve with lemon wedges on the side.


similar recipes:


mung bean & cilantro falafel tacos

mung bean & cilantro falafel tacos

chickpea & avocado tzatziki salad

chickpea & avocado tzatziki salad

HOW TO MAKE VEGAN LABNEH & A FEW WAYS TO USE IT by Lindsey | Dolly and Oatmeal


ok, first of all, i’m sure some of you are wondering: what is labneh?

labneh is essentially what you get when you strain yogurt to get a thick, cream cheese-like yogurt - some people have used the term “yogurt cheese” to describe it, but i’m going to lay off that one because i feel like it could perhaps turn some people off. it’s true though, labneh does have a cream cheese-like texture, but i’m going to argue that it’s even better than cream cheese. straining the yogurt gives labneh a distinct tanginess that doesn’t come close to much else. and when you dress it up with toppings it just makes the flavor sing that much more.

vegan labneh is a bit different than traditional labneh. first of all, it contains more water since the one we use here is made from almond milk (ingredients: almonds and water). therefore, i like using a nut milk bag to strain it rather than cheesecloth. we also add a bit more lemon juice and salt, since plant-based yogurt doesn’t inherently have the level of tang that dairy-based yogurt has. the added salt just brings out that tanginess a bit more.

what do i need to make it?

first of all, it’s super easy! all you need are a few essentials that you probably already possess:

  1. a large deep bowl.

  2. a fine mesh strainer.

  3. a nut milk bag.

secondly, you will need 3 ingredients:

  1. kite hill plain unsweetened greek-style yogurt.

  2. fresh lemon juice.

  3. fine sea salt.

plus, 24 hours in a refrigerator. that’s it!

why should i make this labneh?

i can’t tell you what to do, nor do i want to! but, i can nudge you (i’m good at nudging)! firstly, labneh can go with just about anything, and can be made into so many different things - both sweet or savory: cake/cupcake frosting, the base for a fruit compote, eaten plain with a drizzle of honey, used as a dip for your preferred protein, thinned and tossed into pasta, plopped onto flatbread or pizza (see below), sweet or savory toast (also see below), the base for a leaf-less salad - the options are almost limitless. but i nudge mostly because there’s nothing more satisfying than making something this delicious with your own two hands that’s essentially effortless - have i convinced you yet?


in all seriousness this recipe came about because it seems with each of my pregnancies labneh is all i’ve wanted. the first go round with amesy, frank and i would frequently have brunch at a local restaurant in brooklyn, miriam. i would order the israeli breakfast - egg scramble, labneh with a pool of olive oil and za’atar in the middle; breakfast potatoes, israeli salad, and a side of their green tahini - if i close my eyes tight enough, i can still taste that delightful meal.

i don’t generally consume dairy, but that labneh at miriam was all i wanted. though, after i had amesy, the craving for it significantly diminished - until this pregnancy! however, this time around the discomfort that comes with consuming cow-based dairy products is more uncomfortable for some reason. thankfully, with all the amazing plant-based yogurts on the market, making your own vegan labneh is quite easy. why did i choose the almond milk-based yogurt in this recipe? simple, it’s a greek-style yogurt and therefore its’ consistency and flavor is consistent with that of a dairy-based greek yogurt - and it’s so, so good. i can’t wait for you all to try it! and i’d love to hear what you all like using labneh for, there are so many options, but i know i’m probably missing a bunch!

xo’s and happy april!


how to make vegan labneh & a few ways to use it


vegan labneh

| makes just about 3 cups |

ingredients

| makes roughly 3 cups |

method

  1. line a fine mesh strainer with a nut milk bag, and place them over a large bowl, making sure the bowl is big enough that the strainer doesn’t touch the bottom - you want at least an 1 1/2-inches between the bottom of the strainer and the bottom of the bowl.

  2. in another large bowl, stir together the yogurt, lemon juice, and salt. pour the yogurt mixture into your nut milk bag. tie the bag closed, and cover the bowl with a clean dishtowel. place in your refrigerator, and let rest for 24 hours.

  3. after the 24-hour rest period, remove the dishtowel. at this point there will be quite a bit of liquid at the bottom of the bowl - discard it - and when you loosen your nut milk bag you will find that your yogurt has thickened significantly.

  4. congratulations! at this point your yogurt is now labneh! yay!

  5. scrape the labneh from your nut milk bag and store in an air tight container for up to 1 week.


labneh dip w/ pistachios, herbs & za’atar

| serves 2-4 |


ingredients

  • 1 cup vegan labneh

  • 2 tablespoons toasted & chopped pistachios

  • 1 tablespoon mixed herbs (i used mint and chives)

  • 1 tablespoon za’atar

  • 1 tablespoon extra virgin olive oil

  • a good pinch flaky sea salt

method

  1. in a shallow bowl (or on a large plate), spoon the labneh into the center. use a spoon to smooth the labneh into the bottom of the bowl, spreading it out to the sides as you go (you could easily just plop it into a bowl, but this creates those lovely little divots into which your nuts, herbs, za’atar, and evoo will pool).

  1. sprinkle with your toppings and serve immediately with crackers, toasty bread, freshly cut veggies, etc.!


charred spring onion & labneh flatbread

| serves 4 |


ingredients

  • half of this gluten-free dough recipe (or dough recipe/store-bought flatbread of choice)

  • 1 tablespoon avocado oil (or another neutral high heat oil)

  • 1 bunch spring onions, white and light green parts cut in half, then in quarters

  • 1/2 cup-3/4 cup vegan labneh

  • 1 tablespoon za’atar

  • 1 tablespoon chopped fresh dill

  • flaky sea salt

  • extra virgin olive oil, for drizzling

method

  1. preheat oven to 500°F and place a pizza stone inside.

  2. press your dough out into a large oval, with about 1/4-inch thickness. once your oven has preheated, bake the crust for 10-12 minutes, until edges are crisp, and the center is cooked through.

  3. let the flatbread cool on a rack while you char the onions. heat a large cast iron skillet to medium-high. once hot, add the oil and half the sliced onion pieces, cut side down. cook for 1-2 minutes, until lightly charred; turn them over and cook the other side for about 1 minute, until mostly tender and golden. remove onions and let them rest on a paper towel-lined plate. repeat with the other half of onions, adding more oil as needed.

  4. spread 1/2 cup labneh evenly across the flatbread (an offset spatula does the trick wonderfully), if you need more, add the additional 1/4 cup. top with the charred onions; sprinkle with the za’atar, chopped dill, and a couple pinches flaky sea salt. finally, drizzle with olive oil, and serve :)


labneh & jam toast

| makes 1 serving |


ingredients

  • 1 slice toasted and cooled bread

  • 1/4 cup vegan labneh

  • pinch sea salt (optional, but highly recommended)

  • 1-2 tablespoons favorite jam/preserve

  • roughly 1 teaspoon toasted & chopped pistachios

method

  1. plop the labneh into the center of your toast. use a spoon to swoosh the labneh out to the corners of the bread, creating little divots. then sprinkle with a pinch of salt.

  2. spoon the jam into the divots, spreading it out toward the edges of the bread. sprinkle with chopped pistachios, then inhale ;)

similar recipes:


macadamia ricotta & black currant jam on toast

macadamia ricotta & black currant jam on toast

chickpea flour flatbread w/ new potatoes & fresh basil

chickpea flour flatbread w/ new potatoes & fresh basil

bean-less sunflower seed & black garlic hummus

bean-less sunflower seed & black garlic hummus

GARLICKY, HERBED CAULIFLOWER RICE W/ PEA SHOOTS by Lindsey | Dolly and Oatmeal


spring has sprung in LA! after a pretty cold and wet winter (i heard it was the chilliest one in over 100 years), we’re back in warmer temps, and sunnier days. nothing not to love. i found myself craving lighter meals that still offer a bit of warmth at the end of the day like this rice. while it’s super spring-y, it still provides you that pleasant cozy vibe for the beginnings of spring. if i remember back to living in nyc (i can’t believe it’s almost been 2 years since we moved to LA!), i can imagine the chives just starting to sprout up in our little garden in brooklyn, or the ever so tiny buds beginning to show themselves on the branches of our crab apple tree. here in southern california you can get pretty much any seasonal vegetable year round, which, while wonderful, is still confusing to me and my sense of what others are experiencing across the country.

i was at my favorite neighborhood market, cookbook, the other day. they had artichokes, cauliflower, snap peas, every kind of fresh herb, and a big bowl filled with pea shoot bouquets. it’s times like these that the excitement of picking out what’s calling to you, bring it home, and cooking up a meal on the fly. that’s what this dish was.

a meal on the fly that just happens to be something lovely enough to share here. i’m a sucker for a garlic & herb situation, and i’m always on the lookout to make cauliflower rice more palatable. so this dish combines great flavor, but also a super easy technique for making really tasty cauliflower rice. the result is a flavor you know and love mixed with a side of health - win, win!

so what’s the technique that takes a gritty, riced cauliflower to one that’s supple and actually rice-like? butter! every time i’ve made cauli rice in the past, i’ve sautéed in olive oil. and while i’m sure it might taste ok for most people, i always felt there was something missing. the (vegan) butter makes everything more luscious and full of flavor, something olive oil just can’t offer here. i also used about 2 tablespoons more of water to steam the cauliflower than i have in the past, which made a huge difference in its texture. the addition of both them here makes this cauliflower rice a bit more next-level 👌🏼

xo!


garlicky, herbed cauliflower rice w/ pea shoots | gf & v

  • i like serving this on the side of cooked fish or chicken (although it would be lovely with any animal protein), i also think adding cooked, marinated lentils or chickpeas would be a great addition for a plant-based version.

print the recipe

| serves 4-6 as a side |

  • 1 head cauliflower, cut into medium-sized florets

  • 3 tablespoons vegan butter (i use miyoko’s brand)

  • 2-3 cloves garlic, minced

  • 1/4 cup water

  • 1/2 cup chopped herbs (i used an equal amount of chives and parsley)

  • salt & fresh pepper

  • 5-6 radishes, sliced thin on a mandolin or with a knife

  • 1-2 cup pea shoots, microgreens, chopped baby spinach, etc.

  • squeeze of lemon juice


method

  1. start by ricing your cauliflower. in a food processor fitted with a metal “s” blade, or in an upright blender, rice the cauliflower florets in batches, blitzing them just until they reach small rice-sized pieces (over-blitzing will result in cauliflower mush, so be on the lookout). set the cauli rice aside.

  2. heat a large rimmed saute pan over medium heat, once hot. add the vegan butter. once it’s melted and bubbly, add the garlic and stir, cooking the garlic until fragrant; about 1 minute. add the cauliflower rice and the water, stir, cover, and turn the heat down to medium-low. let the cauliflower rice cook 6-7 minutes, until the water has evaporated and the cauli rice is tender but not overly mushy. remove from heat and add salt and pepper, to taste.

  3. throw in the sliced radishes, pea shoots (or whatever tender green you’re using), and squeeze everything with a splash of lemon juice. toss it all together, taste and add more salt/pepper, or lemon juice if need be. serve immediately.


more spring recipes:


sweet pea oven risotto w/ garlicky pea shoots

sweet pea oven risotto w/ garlicky pea shoots